
Cheap, Discreet yet Powerful Privacy-Friendly Home Theater
Building a cheap and discreet home theater with privacy-friendly tools
Home theaters can seem complex and expensive to setup. Except, they are not necessarily.
Intro
I always wanted to build a home theater. I recently had some time to spend on it and decided to build one. It had to be:
- relatively cheap (under 2000€)
- as invisible as possible when not used (not in a dedicated room)
- powerful enough to enjoy a real home theater experience
- use open source software whenever possible
- usable for watching movies/tv-shows and play video games
- support 4K HDR with the current file format standards
The open source requirements will be only present in the sofware part. The reason why I need open source tools is because proprietary software is often malware. As most of the harware itself is not connected to the internet, no data collection can be made, which solves the privacy issues of proprietary software.
For the ones who wonder why privacy is important :
With that aside, let’s dive into it !
Hardware
A home theather is usually composed of 5 main parts :
- videoprojector
- screen
- amplifier
- speakers
- HTPC (Home Theather PC)
VideoProjector
The requirements were :
- 4K HDR support
- low input lag (for video games)
After some thinkering, specs and price comparisons, I went with the ViewSonic X1-4K. It is now discontinued and replaced by the X2-4K, but I could not find any difference, besides the price (and same warranty).
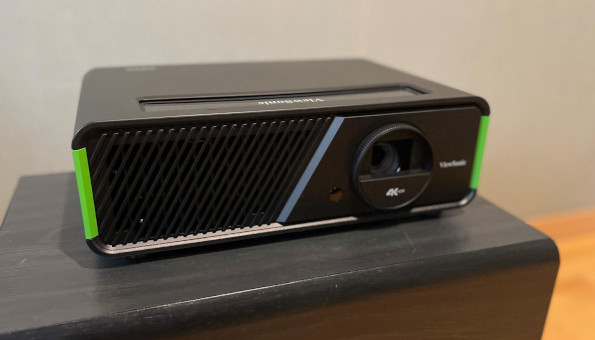
This projector uses the DLP technology, which might cause a little bit of color tearing in fast movements or high contrast scenes. But it is barely noticeable for the trained eye, and went unnoticed by my friends and family. Also, its long life expectancy (30 000h) and cheap price balanced it.
The icing on the cake : it supports 3D content. However, the technology used makes it very uncomfortable to use.
Price (new): 999€ on amazon
Screen
Buying a screen new can be quite expensive. Considering that their quality doesn’t really go down with time, I went for a second hand one. Considering the 4K image, it was better to use a 4K-ready screen. However, I did some tests with a screen I already had, made for 1080p, and the image quality/resolution was still really good.
Living in France, I browsed leboncoin for screens around me, and found a Lumene Coliseum 4K-ready with a width of 2.9m, which was quite a good fit for my room. I wasn’t really picky about a specific screen. The main requirements were the width and the fact that it could be hung up the ceiling for discretion.
Price (new): 2100€ Price (second hand): 300€
Yes, this was quite a good deal, but second hand websites have tons of them. This screen only has 2 small grey marks, which were totally invisible when the videoprojector was on.
Amplifier/Speakers
If you browse r/hometheather nowadays, most people recommend new audio systems with receivers that receive both audio and video. But those systems are quite expensive. The good news is: old equipment aged really well, and was already very good at the time ! And even better news, second hand websites are filled with such equipment. The reason: it takes up quite some space and nowadays people prefer having a small soundbar (even if it’s quite a bad sound quality).
Not being an audiophile, I wasn’t very picky about the quality (but still wanted something decent). I wanted something that didn’t sound like crap and had enough juice to give an actual home theater experience. Also, I wanted to go with a 5.1 system to have some surround effect.
I bought a first set of speakers + amplifier for 150€. Everything seemed fine when trying it out (all the speakers worked fine). But when trying it at home, I discovered that only the side channels and the subwoofer worked. When we tried the speakers at the seller’s house, we plugged all the speakers one by one on the same output for simplicity.
So I sold back the amplifier to the seller (who was really nice with me) and bought a new set for 170€. And this time, the speakers were partly broken, only the tweeters worked. Before buying it, we tried the speakers on the seller’s tv. The sound was very high-pitched and I thought it was simply the tv’s output that was like this, and the seller was a bit in a rush. At least, the amplifier worked as expected.
Anyways, I ended up with working speakers, and a working amplifier.
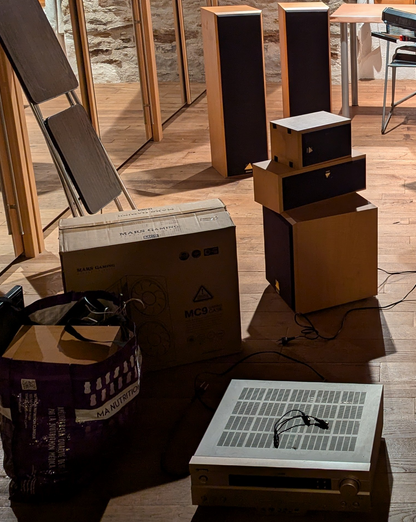
Final price (second hand): 250€
HTPC (Home Theater PC)
That part was quite tricky. A lot of people might go with :
- apple TV/chromecast
- nvidia shield
But those options are both quite expensive (compared to what else is available) and no home theater software support them.
As I was not going to stream content from Netflix or similar services, I did not need a device compliant with their DRM crap technology.
The Odroid devices seemed to be the best value for your buck for what I was looking for. My requirements :
- 4K
- HDR
- hevc hardware decoding
- 3D
- CoreElec support
The cheapest one was the Odroid N2 (not the N2+). It is starting to age (came out in 2019) but the technology was already quite good at the time for what I needed.
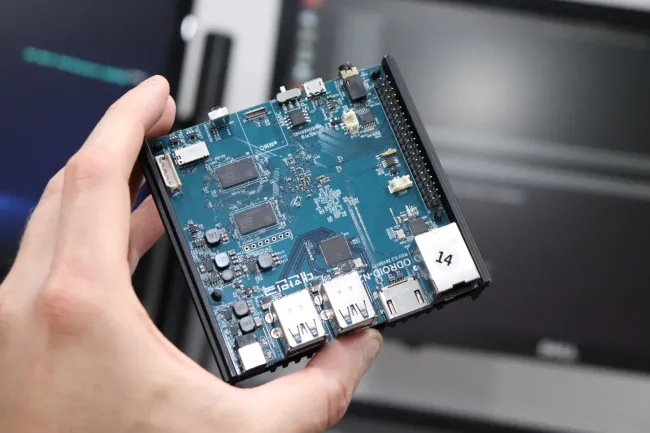
Price (second hand): 80€
Note: To play games, I am using a dedicated computer. Specs :
- intel core i5 11th gen
- nvidia GTX 1080
- 32GB ram
- 1TB ssd
This is not the biffiest setup but it can run the latest AAA games in 4K with low settings at 60fps, and all the siwtch games upscaled to 4K at 60fps, which is fine for me.
Additional equipment
A few additional equipment were necessary :
- electric wire to connect the speakers to the amplifier (17€ for 50m)
- optic cable to connect bring the audio to the amplifier (11€ for 10m)
- audio/video splitter to direct the audio to the amplifier and the video to the videoprojector (30€)
- 3D galsses (turned out useless) (32€ for 2 pairs)
Software
Video content
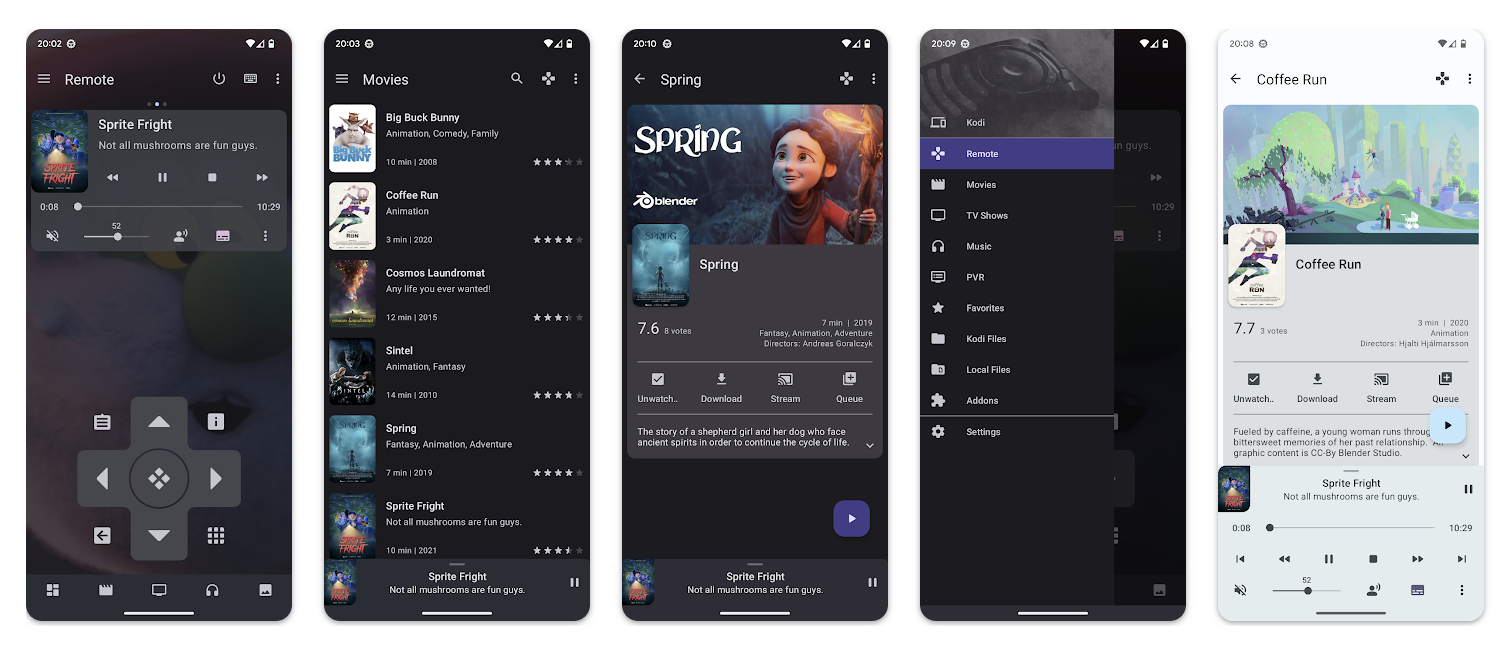
To watch movies and tv-shows, I decided to use CoreElec. It offers a very convenient and good-looking interface, with tons of customizations. Based on kodi, the only open source software actually made for home theaters. Also, I already had a jellyfin server, and kodi binds itself really well with it.
I will not detail anything about the jellyfin configuration here, there are already a ton of good guides on this.
The theme I chose was Arctic Fuse 2, which (imo) really levels up the Kodi experience. It looks modern, and supports ClearLogos.
The setup is quite straightforward, adding some widgets and configure their shortcut to the various jellyfin libraries, and voilà !
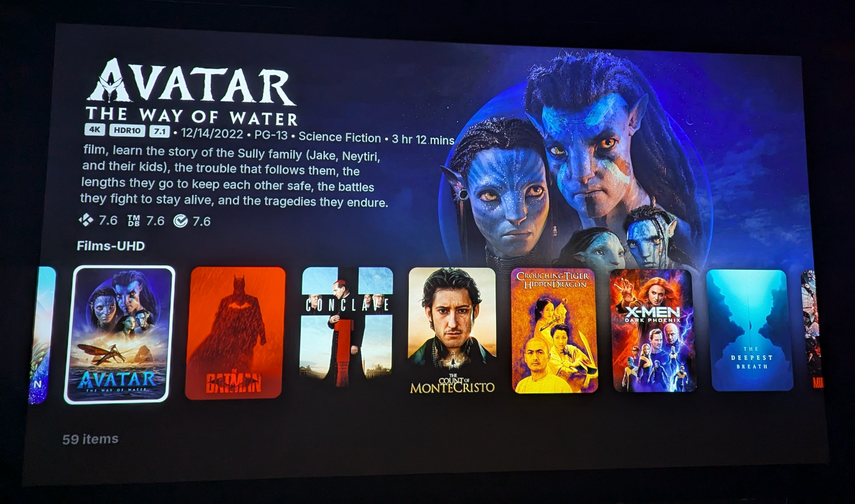
Finally, Kodi has a mobile app that can be used as a remote controller, Kore. The Odroid N2 also supports IR controllers (any TV/DVD Player/etc. remote works), but I don’t find them as convenient as Kore. Kore also allows to quickly change subtitles, see metadata about the content (casting, etc.), etc.
Video Games
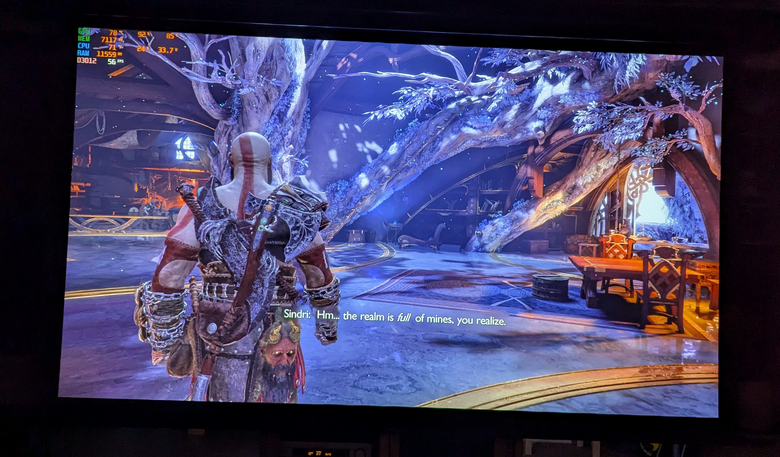
Considering that this guide is targetting open-srouce software, I should tell you to play games on a linux machine. While a lot of people have a great experience with it, I didn’t. As much as I love linux, I still decided to play on windows. Some of the games I play were simply not working (at all) on linux (for now). I will for sure try out linux gaming again in a few years !
To make the experience more enjoyable and console-like, I installed a game launcher. I wanted something easy to setup, that supports both pc and emulated console games. After trying out most of them, I decided to go with Playnite. This program is windows-only. I usually wouldn’t support this kind of software, but for the sake of simplicity, I went with it, at least it is open-source !
To make the full-screen experience nicer, I used the theme ubiquity.
Playnite also has controller support (no need to use your mouse and keyboard). I configured windows to open the session without a password and launch playnite on boot.
And voilà !

Note: For the ones going with linux gaming, I strongly recommend the Pegasus-fe launcher. With its many themes and very flexible configuration, it is a very good fit for a couch linux gaming experience.
Conclusion
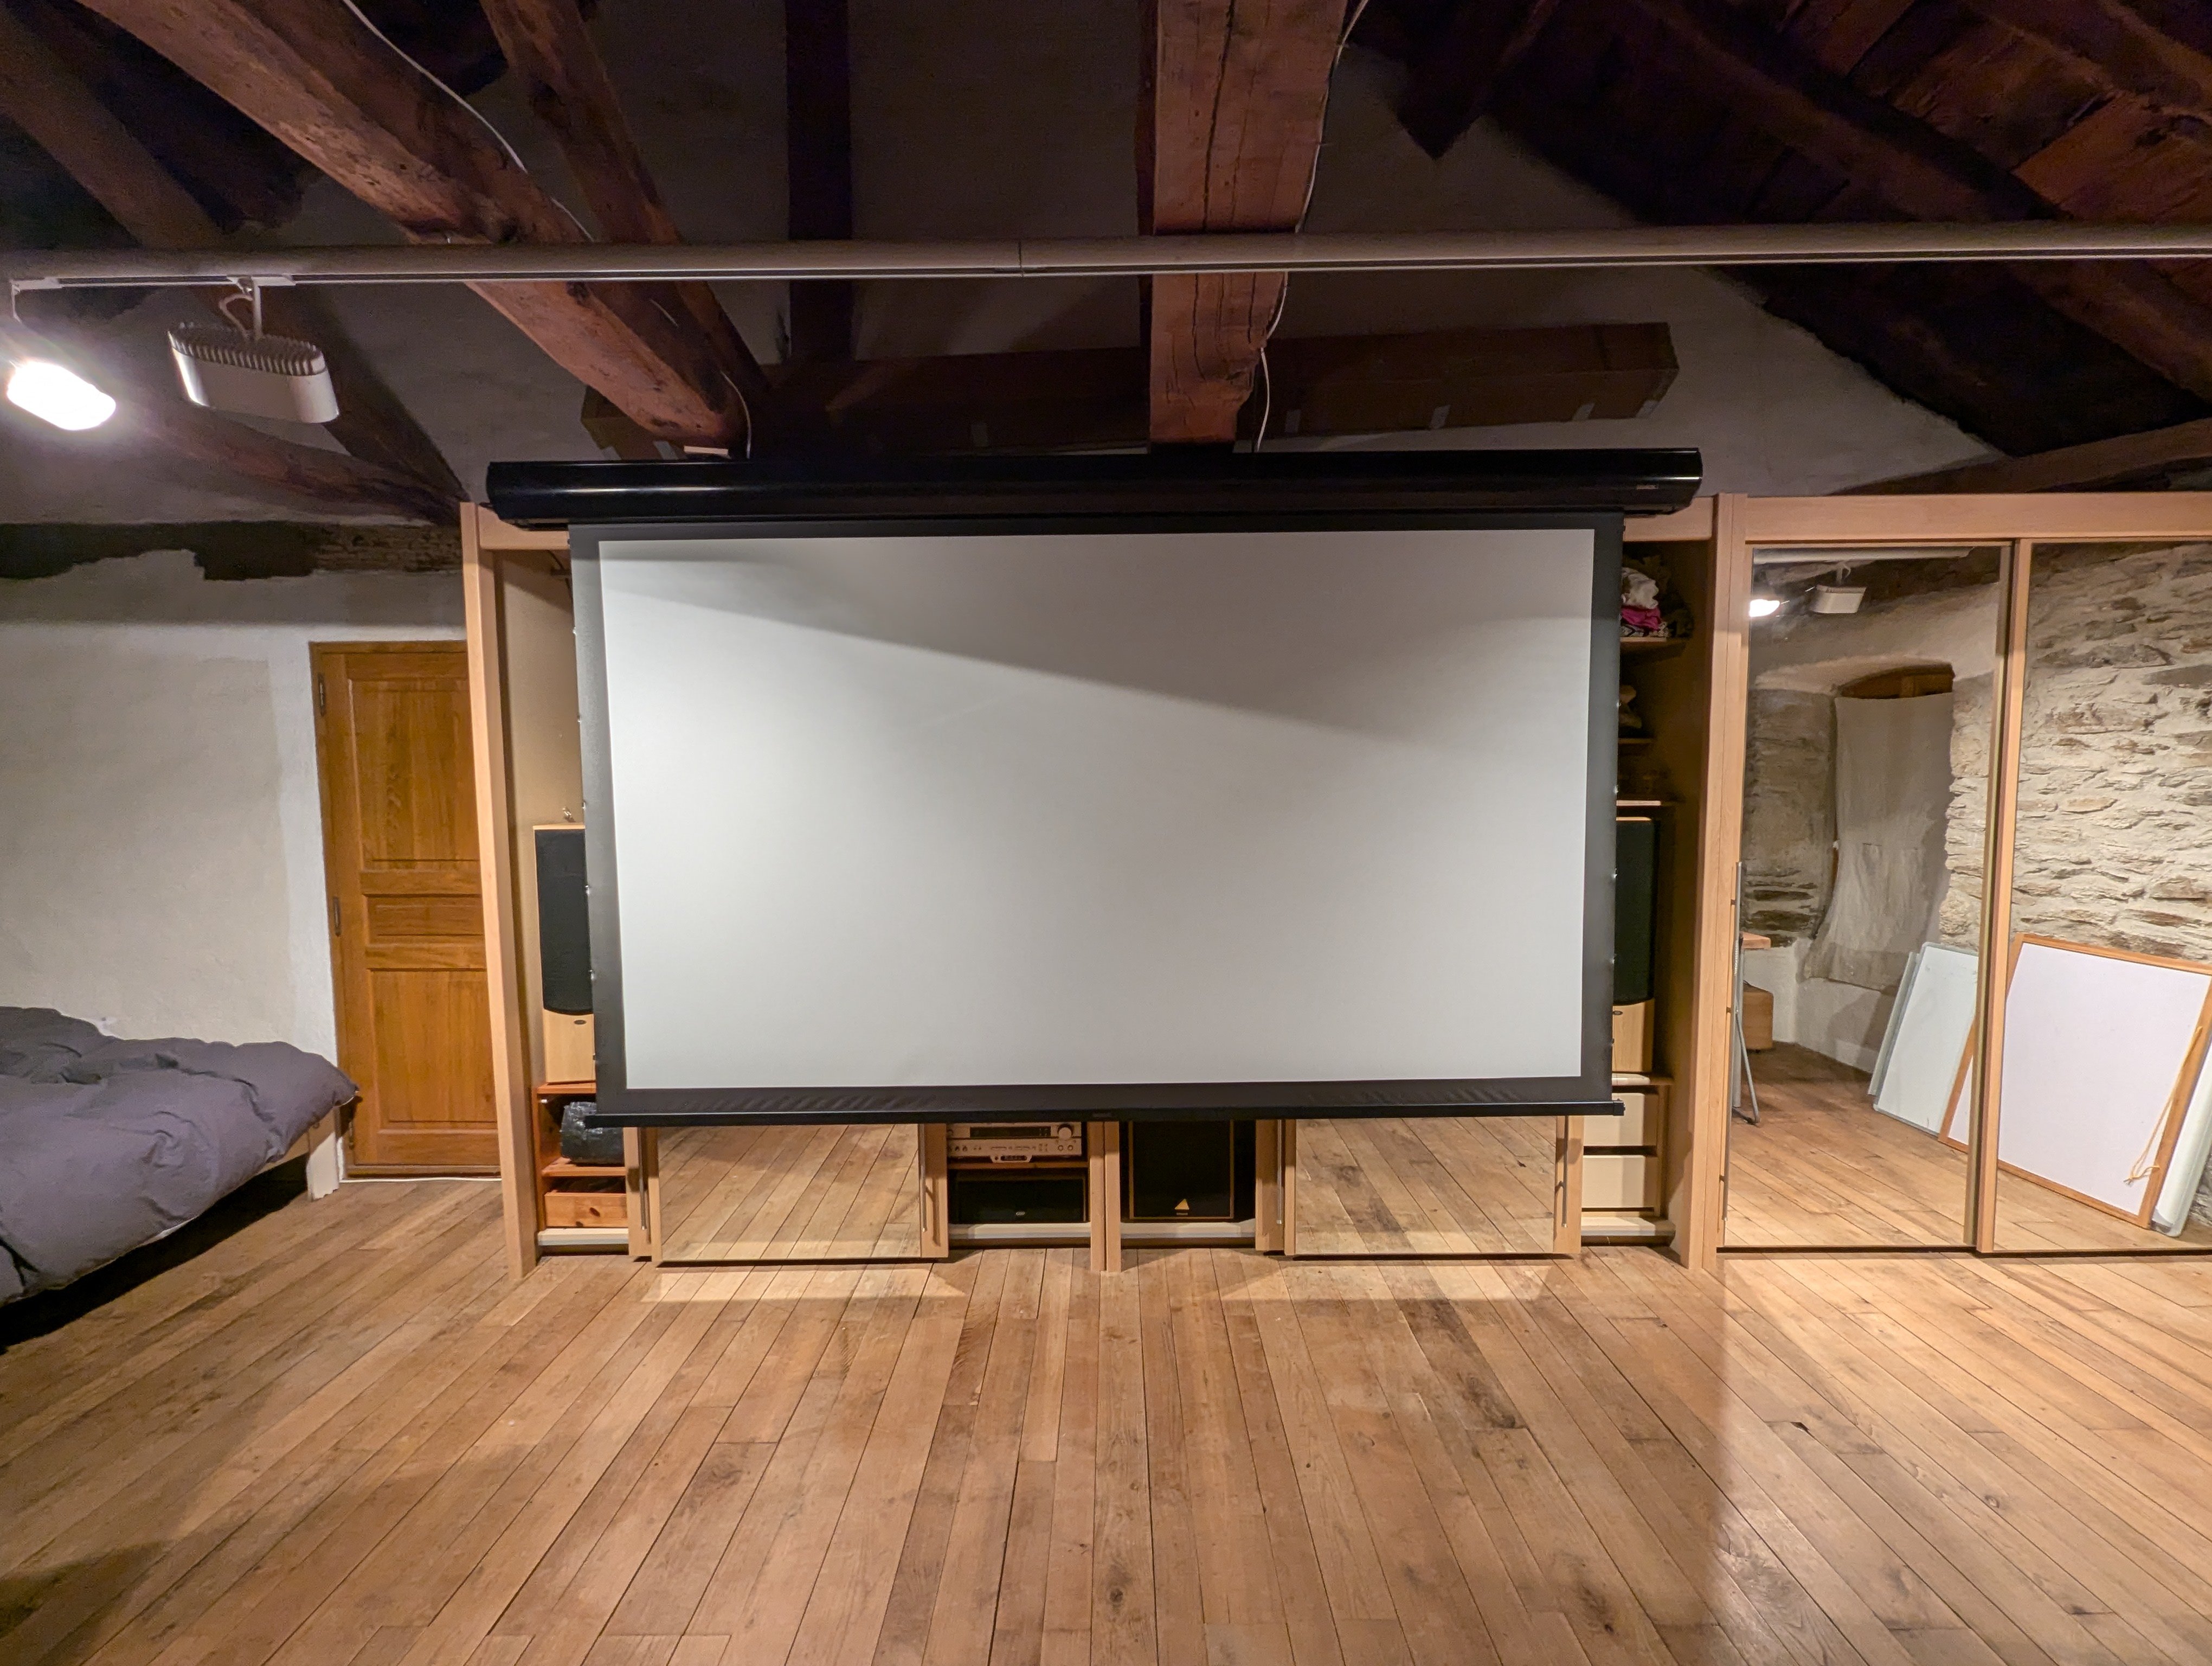
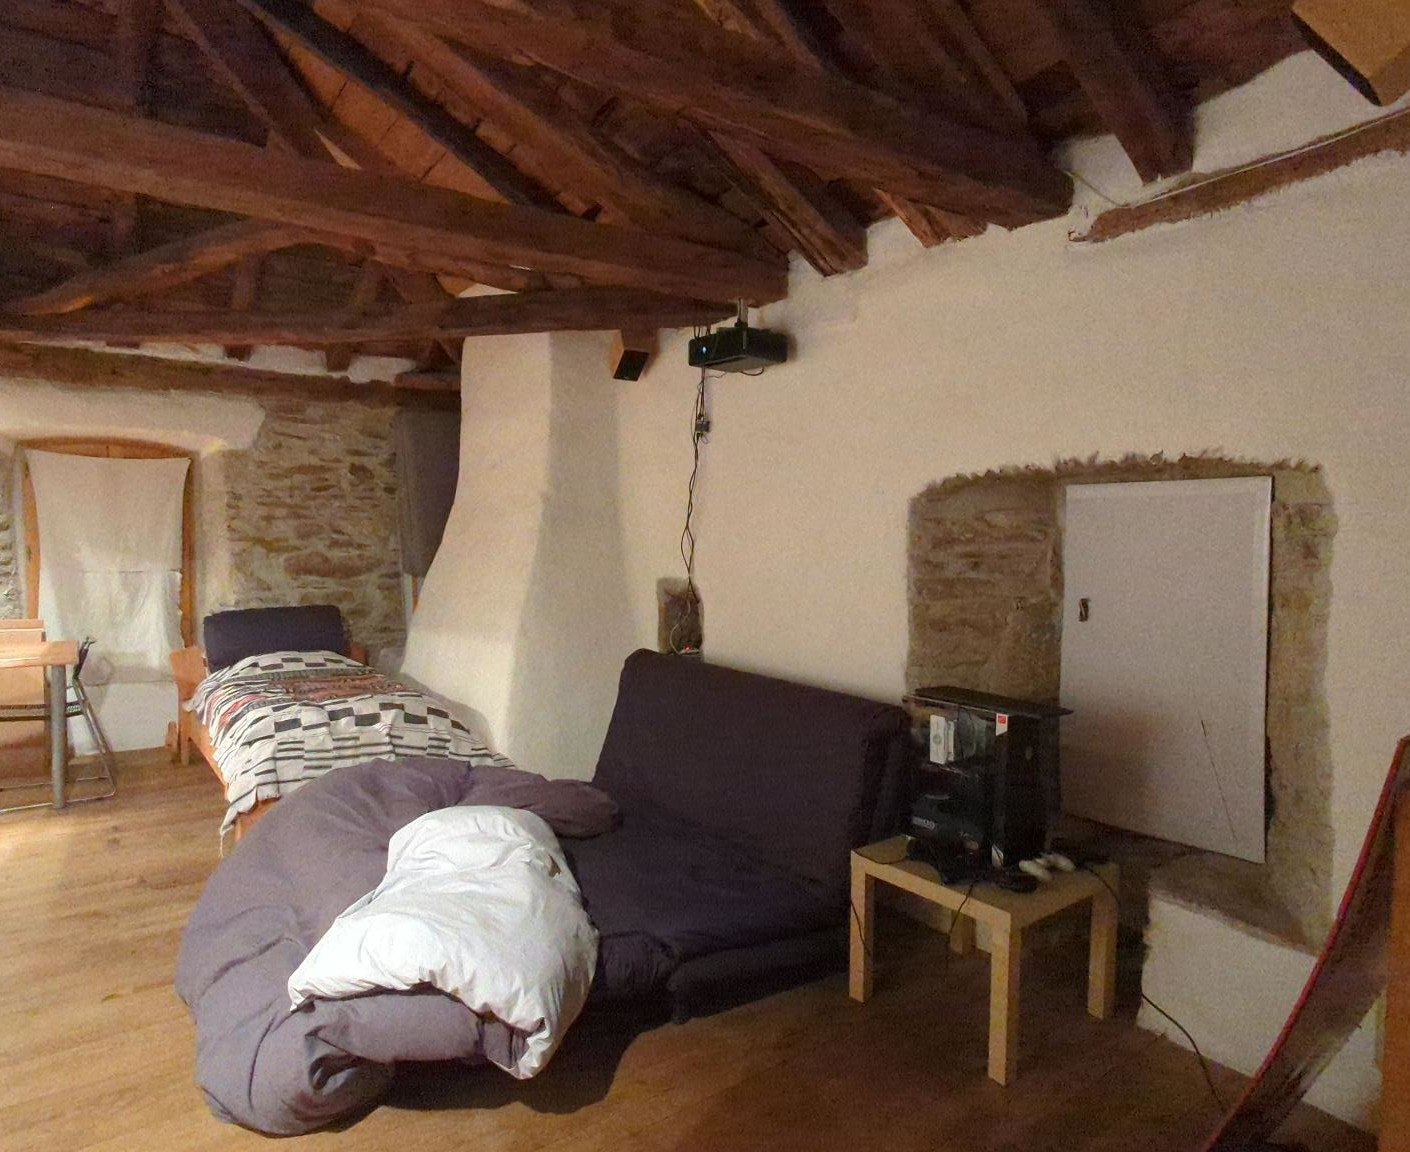
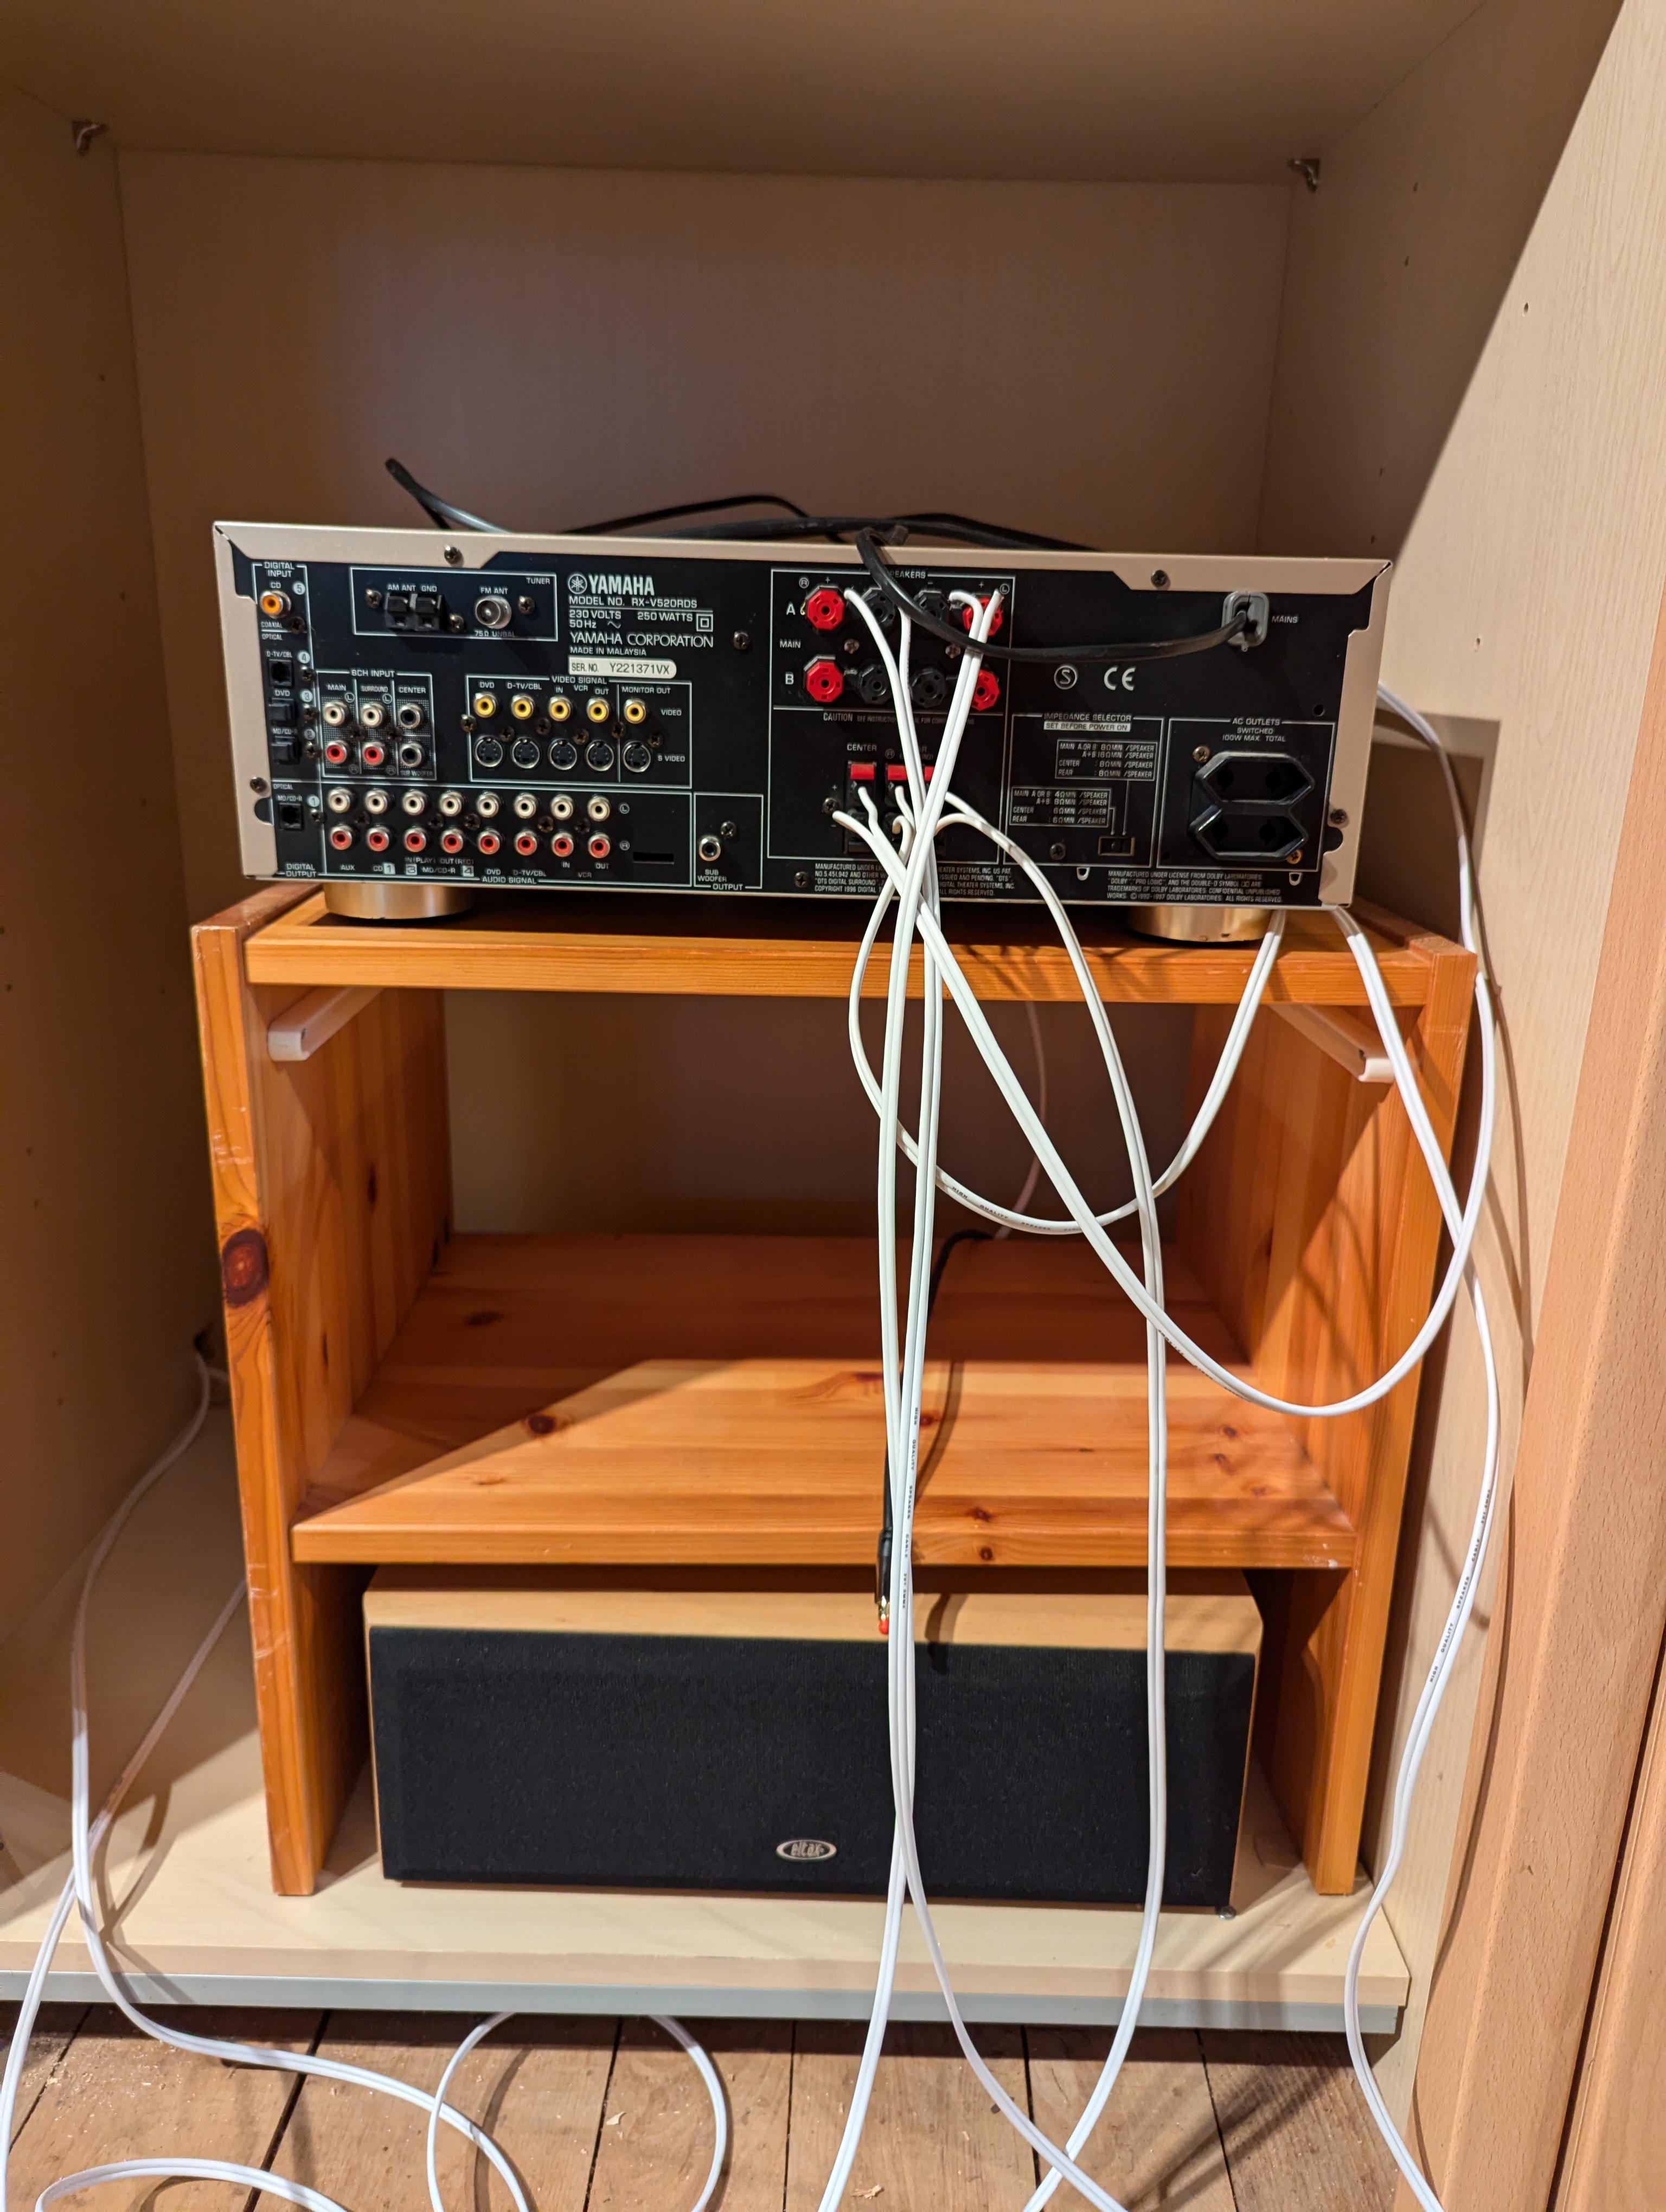
A few more words on the physical setup. The wires are hidden in the closet and go over the wooden trunks on the ceiling. The front speakers are in the closet and are hidden as soon as the doors are closed. The screen can be rolled up into its case.
The back speakers are attached to the ceiling and not properly centered. Yes the sound is not properly balanced, but the back channels are “ambiant” channels, and you will still get the surround effects. It sounds much better than I expected it. They are positionned like this to fit the architecture of the room and be the least visible possible.
The HTPC is in the square hole in the wall. The cables running on the wall are : hdmi, power cable for the videoprojector.

I was scared that the closet would vibrate with the speakers, but it doesn’t ! The only vibrations I got was on very specific frequencies, with a very high (too high to enjoy) volume, the back part of the closet was vibrating, as it is a very thin wood layer.
The side speakers are a little bit behind the screen, but that does not block the sound in any noticeable way.
If you have any questions/comments, feel free to open an issue on the github repository of this blog.